domenica 31 ottobre 2010

TIMBROSCRAPMANIA DT CHALLENGE

Oggi il tema del challenge di TIMBROSCRAPMANIA è davvero goloso........ CUPCAKE!!!!
Questa è la card che ho preparato per l'occasione........

Today the theme of TIMBROSCRAPMANIA challenge is really delicious...... CUPCAKE!!!!
This is the card I made for this occasion...........


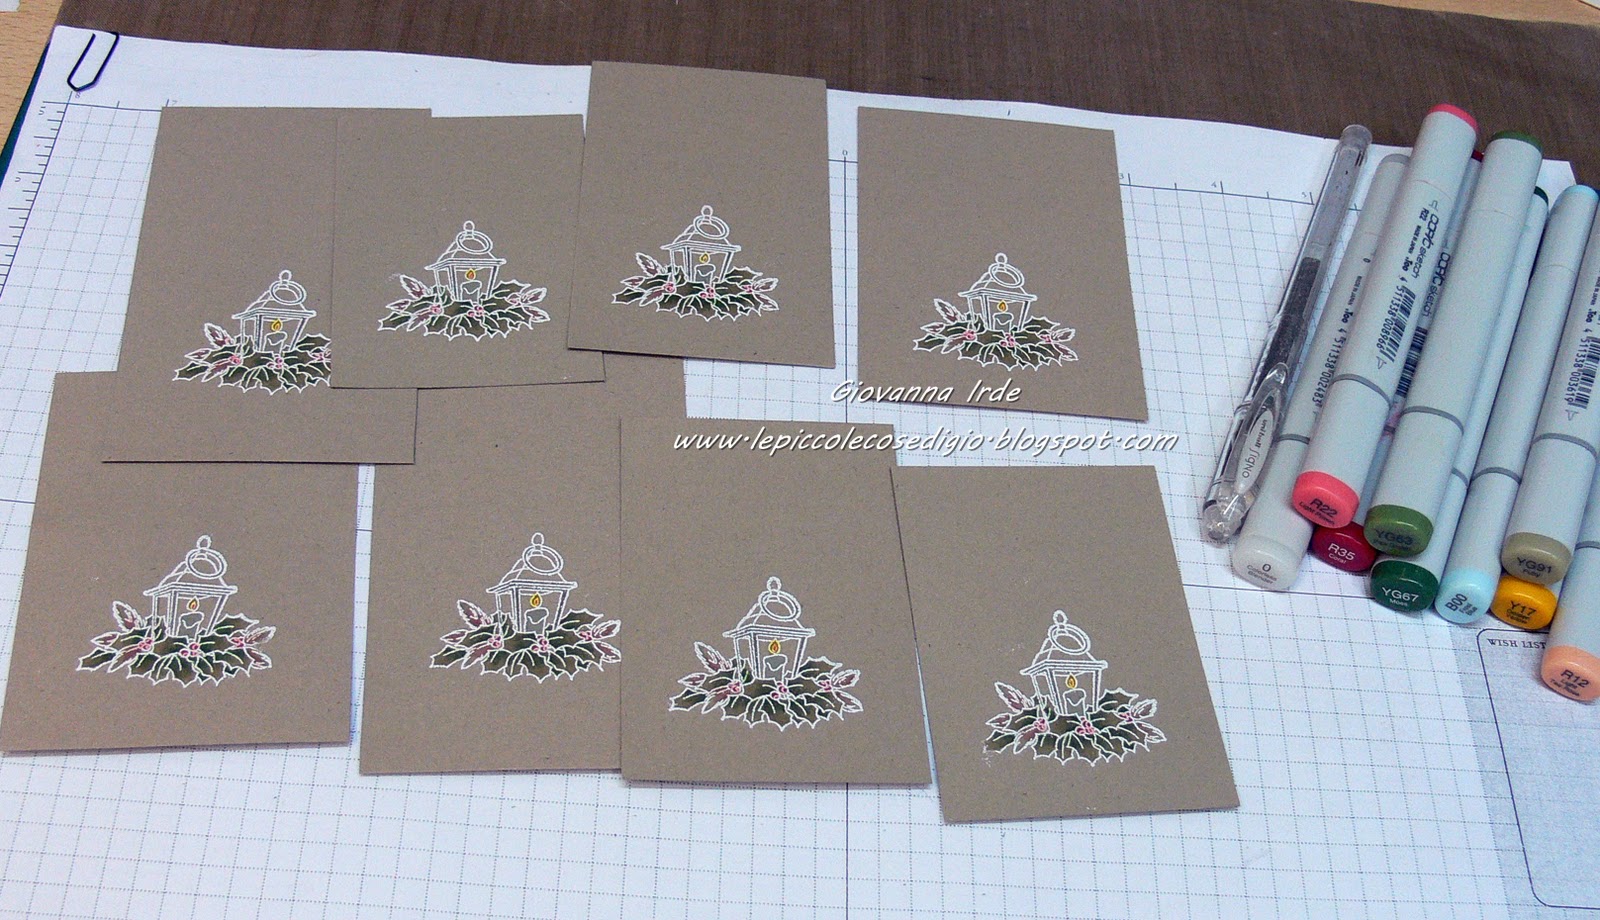
Ho usato un bellissimo timbro della Magnolia dalla collezione Bon Voyage. L'ho colorata con i Copic Markers, a parte il pantalone e la camiciola, per i quali ho usato la tecnica del paper piecing.
 Le carte sono Basic Grey, collezione Basic Kraft, Basic Manila e Lemonade.

I used a beautiful Magnolia stamp from Bon Voyage collection. I colored it with Copic, but for the shirt and for the short I used the paper piecing tecnique.
The papers are Basic Grey from Basic Kraft, Basic Manila e Lemomade


Il cartoncino Kraft nella parte inferiore della card è embossato con una placca di Tim Holtz e poi distressata con i Distress Ink Pad Victorian Velvet, Bundled Sage e Pumice Stone.
Per la scritta ho usato un banner della Magnolia all'interno del quale ho stampato la scritta con l'aiuto dello Stamp-a-ma-jig.

Kraft cardstock in the bottom of the card is embossed with Tim Holtz plate and then distressed with Distress Ink Pads Victorian Velvet, Bundled Sage and Pumice Stone.
For the text I used a Magnolia banner and inside it I stamped the sentiment with help of Stamp-a-ma-jig.


Le uniche piccole decorazioni di questa card sono il bellissimo nastro con i cuori della making memories e la piccola spilla con attaccato un charm di metallo.

Only little embellishment in this card are a fabulous MakingMemories ribbon and the little pin with a metal charm.


Eccoci qua, io la mia parte l'ho fatta LOL adesso tocca a voi!!!!
Vi aspettiamo in tante!!!

Here we are, I made my part LOL and now is your turn!!!!
We wait for many of you!!!

Thanks for stopping by.

Giò


Materials
Stamps: I Can Fly TildaKitchen Banner from Magnolia; Hero Arts sentiment; Stampin Up cupcake.
Papers: Basic Kraft, Basic Manila, Lemonade from Basic Grey.

sabato 30 ottobre 2010

Whiff of Joy DT meets Basic Grey challenge


Buongiorno amiche stampers!!!!
Oggi per il challenge della Basic Grey, vi propongo il bellissimo sketch di Heather!!!!

Good morning stampers friends!!!!
Today for Basic Grey's challenge, I propose you Heather gorgeous sketch!!!!

Me - Basic Grey

E perchè non approfittare dell'occasione per mostrarvi un'altra anteprima dei bellissimi prodotti
 Whiff of Joy in uscita  il 1° Novembre?????
Questa chiesetta nei boschi è stato amore a prima vista e ho scelto di colorarla con colori pastello che richiamassero la bellissima carta Basica Grey che fa parte della collezione Eskimo Kisses.
Per colorare ho usato i Copic e poi ho aggiuto un colore 3D effetto neve e ancora una valanga di glitter.

So why don't use this occasion to show you another preview of the beautiful Whiff of Joy products, exiting on November, 1st????
This little church on woods was love at first sight and I chose to color it with pastel colors which call back the beautiful Basic Grey paper from Eskimo Kisses collection.
To color I used Copic and then I added a 3D color snow effect and also a shower of glitter.
 

Un'altra anteprima è la die con le foglie di agrifoglio e la die con le swirls...... sono fantastiche!!!!
Come bacche ho usato delle mezze perle.

Another preview is the die with holly leafs and the die with the swirls......they are fantastic!!!!
As berries I used half pearls.


Mi auguro che questo lavoro vi dia lo spunto per passare un lungo week end creativo e partecipare al nostro bellissimo challenge!!!

I hope this work would give you inspiration to have a long creative week end and enjoy our beautiful challenge!!!

Thanks for stopping by

Giò


giovedì 28 ottobre 2010

Whiff of Joy DT Preview!!!

Sono molto molto felice di mostrarvi questa antemprima dei nuovissimi prodotti Whiff of Joy in  uscita il 1° Novembre!!!!!!
Sono in uscita quattro meravigliosi timbri e quattro nuove bellissime dies e in più delle elegantissime brad con la perla ..............WOW!!!!!

I'm really happy to show you this new Whiff of Joy products preview that will be released on November 1st.
There will be four fabulous stamps and four beautiful dies and in addition some gorgeous brads with pearl....... WOW!!!!


Questo  timbro è Angel playing the trumpet...... non è dolcissimo?? L'ho colorato con i Copic Markers e sulle ali ho usato l'Ice Stickles Gold Ice mentre per la tromba e per i profili del vestito, ho usato una penna gel color oro.
I meravigliosi fiocchi di neve sono una delle nuove dies e sono veramente versatili. Ho usato la stessa carta usata per la card e ho alternato gli strati, su uno dei quali ho usato glitter a profusione e poi ho chiuso con queste brad con la perla, belle ed eleganti. La carta sono Kaiserkraft, collezione " 'Tis is the Season" e "Dear Santa"

This stamp is Angel playing the trumpet ...... isn't it sweet?? I colored it with Copic Markers and on the wings I added some Ice Stickles Gold Ice, for the trumpet I used a gold gel pen.
The stunning snowflakes are from the new dies and they are so versatiles. I used the same papers of the card and I alternate the layers; before doing that I also added a lot of glitter on one of them, then I fixed with a beautiful and elegant pearl brad. The Kaiserkraft are from " 'Tis is the Season" and "Dear Santa" collection.


La scritta fa farte del Kit Christmas Greetings con il quale avrete tutti i sentiment necessari per le vostre card natalizie.

The sentiment is a part of Christmas Greetings kit  whom you will have all the necessaries sentiments for your Christmas cards.


Sono sicura che questi nuovi prodotti vi piaceranno e nei prossimi giorni sarò ben felice di mostrarvi altre anteprime.
Con questa card partecipo anche al Crafter's Companion Monthly challenge.

I am sure you will like these new products and in next days I will be happy to show you other previews.
With this card I enjoy at Crafter's Companion Monthly challenge.

Thanks for stopping by

Giò

Used in this card


mercoledì 27 ottobre 2010

Whiff of Joy DT meets Stampavie and More challenge

E' già passata una settimana???? Siiiiiii
E quindi è tempo di Stampavie & More challenge.
Il tema di questa settimana è: NATALE!!!
Allora perchè non presentarvi un altro dei nuovi timbri della Whiff of Joy?

A week has passed already???? Yeeeees
So it is time of Stampavie & More challenge.
This week's theme is: CHRISTMAS!!!
So why don't introduce you new Whiff of Joy stamps?


Per colorare questa immagine ho usato i Copic e poi ho aggiunto qualche tocco di glitter.

To color this image I used Copic and then I added some touches of glitter.


Anche la scritta è Whiff of Joy e fa parte del Kit Christmas Greetings, che contiene ben 12 timbri.
Anche qui, tanto tanto glitter, stiamo pensando al Natale no????

The sentiment too is Whiff of Joy and it is part of Christmas Greetings kit, which contains 12 stamps.
Here too, many many glitter, we are thinking about Christmas, no????


Ecco qua, questa è la mia proposta, ora aspetto di vedere le vostre.

So, this is my proposal, now I wait to see yours.

Thanks for stopping by

Giò

martedì 26 ottobre 2010

LO per SCC Blog - Sfida di Ottobre

Avevo proprio voglia di fare un po di scrap e questa foto e il tema della sfida di SCC blog: OCCHI, mi hanno "costretto" a trovare il tempo di mettermi all'opera!!!!
Questa foto era li...... in attesa di essere scrappata!!!! E' una foto della mia bimba Alice, quando aveva solo un anno....... adesso ne ha 16 e a volte ho tanta nostalgia di quei teneri tempi.

I really wanted to do a bit of scrap and this photo and the challenge's theme of SCC blog: EYES, "forced" me to find the time to work!!!!
This photo was there....waiting to b e scrapped!!!! It is a photo of my little baby Alice, when she was one-year-old....now she is 16 and sometimes I want back those tender times.


Mi dispiace che non si veda, ma per fare questo LO mi sono proprio divertita a giorcare con le Glimmer Mist, che ho usato sulla carta di fondo. Sono partita da una cartoncino avorio e giocando con timbri, tamponi, pennarelli e Glimmer è venuta fuori questa patterned......... vi piace??
A me tantissimo ^_^

I am sorry it does not see, but to make this LO I really had fun playing with Glimmer Mist, which I used on background paper. I started with an ivory cardstock and playing with stamps, tampons, felt-tip pen and Glimmer went out this patterned......do you like it??
To me really much ^_^


Le lettere del titolo e i fiori sono Grungeboard della Tim Holtz, come pure la label in metallo.
Le brad per i fiori sono fatte con la I-Top della Immaginisce usando le stesse carte che ho usato nella pagina.

The letters of the title and the flowers are Grungeboard from Tim Holtz, such as the metalic label. The brads for the flowers are made with the I-Top from the Immaginisce using the same cards which I used on the page.


Sono contenta di aver trovato il tempo per scrappare e a proposito di scrap spero di poter presto mostrarvi qualcosa alla quale sto lavorando già da un po'.

I am happy to found the time for scrapbooking and I hope early to show you something that I am working on from a while.

Thanks for stopping by

Giò

domenica 24 ottobre 2010

Box with divisors for Christmas tags tutorial

Ciao a tutti da Giò!!!
Oggi vi voglio mostrare come realizzare una scatola con divisori che conterrà delle tag natalizie.

Hi all, here is Giò!!!!
Today I want to show you a tutorial to make a box with divisors that conteins a lot of Christmas tags.

Avrete bisogno di:
You will need:
Whiff of Joy  Cute Donkey for the sentiment;
Whiff of Joy Noel sentiement from October Store Kit;
Kraft and Ivory cardstock;
1 sheet Acetate;
Memento Tuxedo Black; White Ink; Copic Markers;
White embossing poweder; Heat tool;
Double sided tape; Glue Dots;
Ribbon; Charm; Button; white and kraft wire;
Paper trimmer, Score Board; Big Shot, Scissor.

Ora siete pronte!!!
Now you are ready!!!!


Ho decorato la base della scatola con alcune timbrate in bianco.
I decorate the bottom of the box with some stamps stamped in White.
Mettete un piccolo pezzetto di biadesivo sulle alette.
Put a little bit of double sided adhesive on the little tags.
Capovolgete il cartoncino e attaccate il biadesivo sui quattro bordi.
Turn the cardstock over and attach the double sided adhesive on the four borders.
Prima di tutto attaccate le piccole alette e poi gli altri lati due a due.
First of all attach the little tags and then attach the other sides two by two.

Ora facciamo i divisori.
Now we make the divisors.


Dopo aver piegato i cartoncini, mettete del biadesivo come nelle foto.
After scoring, put the double sided adhesive as in the photos.

Adesso possiamo inserire i divisori nella scatola.
Now you can insert the dividers on the box.
Per il coperchio, usiamo un foglio di Acetato.
For the top of the box, used a sheet of  Acetate.

Per chiudere i bordi ho usato i Glue Dots.
To attach the borders of this top I used a Glue Dots.

Ho fatto 8 tags Kraft e 8 Avorio.
Stampate in bianco sul Kraft e in nero sull'Avorio e poi colorate con i Copic Markers.
I made 8 tags Kraft and 8 tags Ivory.
Stamp in White on Kraft and in Black on Ivory and then color with Copic Markers. 


Posizionate la parte di plastica trasparente sul cartoncino e fate due puntini dentro i fori della plastica.
Position the clear plastic on cardstock and make two dots on the holes on the plastic.
Fate coincidere i puntini con i buchi sulla die in metallo e tagliate con la vostra macchina da taglio.
Adjust the marks with the holes on the metal die and cut with your cutting machine.

Con un piccolo pezzetto di cordino le vostre tag  sono complete, non dovete far altro che sistemarle nella scatola.
Ho decorato il top della scatola con dei nastri e un fiocco dal quale pende un ciondolo, ho anche aggiunto una tag fatta con la Fancy Shape die e la scritta fa parte dello store Kit di Ottobre.

With a little piece of natural wire your tag are completed, you don't have to do nothing only put them in the box.
I decorate the top of the box with ribbons and a bow, I also add a tag made with the Fancy Shape Die, the stamp is from Season's Greeting kit.
Spero che questo tutorial sia chiaro e semplice e che vi piaccia.
I hope this tutorial would be simple and clear for you and I hope you will like it.
Thanks for stopping by.

Giò