mercoledì 22 settembre 2010

Whiff of Joy challenge ANNIVERSARY!!!!!!!

E' il secondo compleanno del challenge Whiff of Joy.........
Grazie, grazie, grazie a tutte voi per averci sostenuto e fatto compagnia in questi due anni.
GRAZIE è appunto il tema che abbiamo scelto per questo challenge.
E per festeggiare cosa c'è di meglio di un piccolo candy e di un tutorial??
Questo delizioso timbro dell'ultima collezione Whiff of Joy, che mi ha gentilmente inviato Katharina (grazie cara), potrà essere vinto da una di voi, vi basterà lasciare un commento a questo post anche più di una volta, ma solo una al giorno, diventare lettori se vi fa piacere e fare un po di pubblicità a questo piccolo candy.
Annuncerò il vicitore di questo blog candy Lunedì prossimo.

It's a Whiff of Joy's challenge 2nd anniversary.........
Thanks, thanks, thanks to all of you for your support and for keep company with us.
THANK YOU is the theme we chose for this challenge.
And to enjoy the party , what is better than a little candy and a tutorial??
This adorable stamp from Whiff of Joy last collection, who Katharina kindly send me (thanks dear), can be win from one of you. You can do it leaving a comment on this post as many times as you like but once daily only, become readers if you want do and please mention this candy on your blog roll.
I will announce the winner of my blog candy next week Monday.
Ed ora veniamo alla card. Si tratta di una criss-cross card e qui di seguito trovate lo step by step fotografico.
Il timbro è  Melinda with bouquet della Whiff of Joy, non è nuovissimo ma lo adoro!!!!

And now the card. It's a criss-cross card and below you find the photo step by step.
The stamp is Melinda with bouquet from Whiff of Joy, isn't new, but I love it!!!


Queste sono le nuove bellissime Dies della Whiff of Joy, da oggi in poi vi mostrerò diversi modi per sfruttarle al meglio. Intanto vi spiego come centrare la timbrata nella tag.

These are the new beautiful Whiff of Joy Dies, from today, I will show you how to use them.
Now I show you how to center the stamping on the tag.


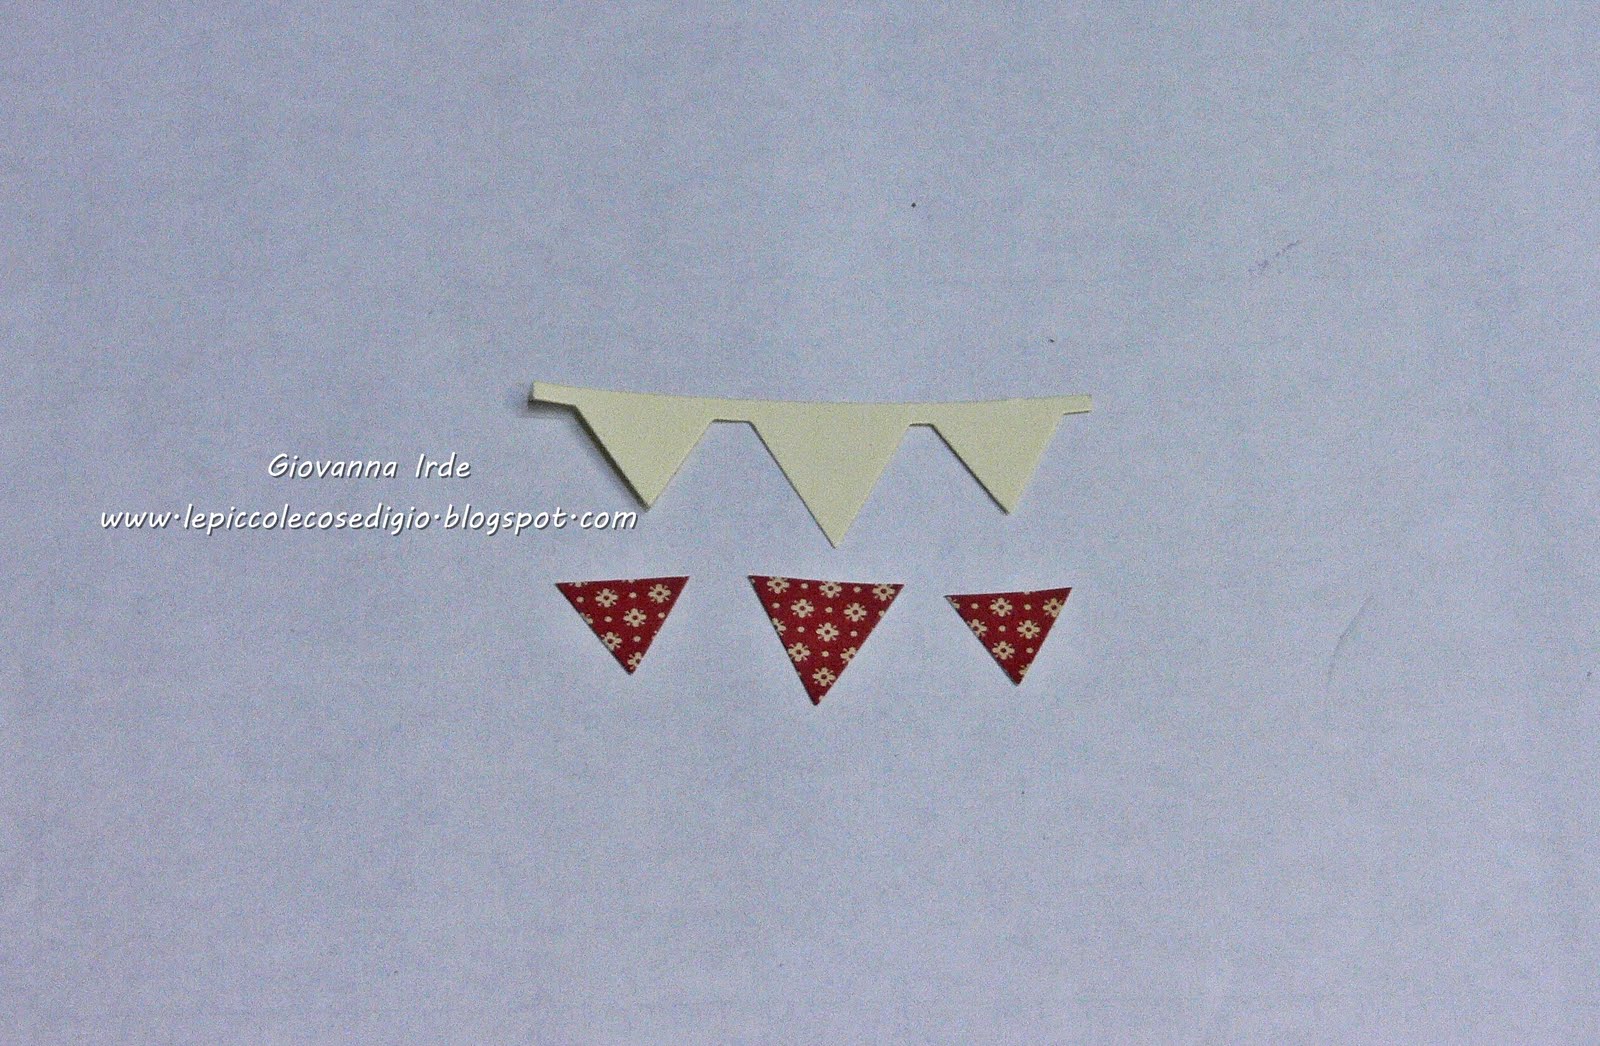

Prima di tutto timbrate la scritta sul cartoncino.

First of all stamp the sentiment on a cardstock.

Poi poggiate la parte di plastica trasparente sul cartoncino centrando la timbrata.
Con una matita segnate due puntini dove ci sono i due piccoli fori.

Then position the clear plastic over the cardstock to see how you must use the die.
Mark two dots on two little holes on the plastic.
A questo punto dovete solo far corrispondere i puntini con i piccoli fori sulla die e tagliare con la vostra macchina da taglio. Questo sistema vi permette di centrare perfettamente qualunque timbrata.

So, you simply need to adjust the marks with the holes on the metal die and cut with your cutting machine.
This way you always have the stamp in the right place.
Adesso potete comporre la vostra criss cross card. Incollate i due lembi e poi assemblate i vari pezzi che avete preparato . Fate anche delle tag da inserire all'interno, io ne ho fatte tre e quella rettangolare misura 4 x 5 1/4.

Now you can compose your criss cross card. Stick the two sides and then all the pieces you made.
Made also a few tags, I have made three and the rectangular one is 4 x 5 1/4.


Spero che partecipiate in tante al mio piccolo candy e che il mio tutorial vi sia piaciuto.

I hope you all will enjoy my little candy and my tutorial liked you.

Thanks for stopping by

Giò

lunedì 20 settembre 2010

Whiff of Joy sales!!!!

Piccolo post solo per mettervi al corrente dei bellissimi saldi che ci sono sullo shop Whiff of Joy!!!!
Saldi fino al 40% ........ Vi ho dato una bella notizia?????
Se volete dare un'occhiata andate qui.
Questa card è fatta appunto con uno dei timbri scontati. I colori sono quelli di Halloween e la zucca è fatta da me con il filo metallico.

A little post only to let you know there are beautiful sales on Whiff of Joy shop!!!!
Sales until 40%....... Did I give you a beautiful news??
If you want to take a look, go here.
This card is made with one of the stamps on sale. Halloween colors and pumpkin wire made by me.


Thanks for stopping by

Giò

sabato 18 settembre 2010

Timbroscrapmania challenge # 11

Sono già passati quindici giorni ed è di nuovo tempo di  TIMBROSCRAPMANIA challenge.
Questa volta il tema è: BORDI!

Fifteen days are passed and it's time of  TIMBROSCRAPMANIA challenge again.
This time theme's: BORDERS!


Finalmente riesco ad usare questo bellissimo timbro della Greeting Farm....... sono arrivati da qualche giorno da TIMBROSCRAPMANIA e già non vedo l'ora di averne altri.
Ho realizzato questa card per una giovane ragazza molto speciale e ho colorato l'immagine con i Copic, usando colori vivaci e forse insoliti, ma mi sono divertita troppoooooo!!

Finally I can use this beautiful stamp from Greeting Farm...... they arrived a few days ago on TIMBROSCRAPMANIA and I can't see the time to have other of them.
I created this card for a very special little young girl and I colored the image with Copic using bright colors, maybe a bit unusual, but I had a lot of fun!!!

Con questa card partecipo anche a questi challenges:
With this card I enjoy this challenges:
Mojo Monday: sketch
A spoon fool of sugar: Autumn Fall colors
Creative Card Crew: Autumn or Fall


Ho realizzato i bordi con due punch.
Lo smerlo sotto la ragazzina e al centro della card l'ho fatto con una punch per angoli di misura grande.
I due bordi in fondo alla card sono invece realizzati con una punch per bordi della Martha Stewart.
Le carte sono della Basic Grey e fanno parte della collezione EERIE.
La scritta (Stampin Up) è stampata ed embossata in bianco ed arricchita con due piccoli bottoncini della Basic Grey, collezione Kioshi.
Per la corona e il fermaglio della ragazzina e per gli altri tocchi di glitter ho usato uno Stickles.

The black borders on the centre and below the little girl are realized with a large corner punch.
I made two bottom borders with Martha Stewart border punch.
Papers are Basic Grey from EERIE collection.
The sentiment (Stampin Up) is stamped and embossed in white and enriched with two little Basic Grey buttons from Kioshi collection.
For the little crown, for the hair clip and for the other glitter touches I used a Stickles.


Tutto il materiale necessario per realizzare questa card lo potete trovare da TIMBROSCRAPMANIA.
A presto e buon week end a tutti!!!!!!

You can find all supplies for this card on TIMBROSCRAPMANIA.
See you soon and have a fabulous week end.

Thanks for stopping by

Giò

mercoledì 15 settembre 2010

Stampavie and More challenge and Whiff of Joy DT

Bellissimo lo sketch che vi propongo oggi per il challenge della Stampavie & More.

Absolutely beautiful the sketch I propose you today for Stampavie & More challenge.


Il timbro è della Whiff of Joy dall'ultima collezione, si tratta di "Henry Christmas Mouse" un delizioso topino che ho colorato con i Copic.
Le carte sono Basic Grey della collezione Eskimo Kisses, hanno dei colori fantastici.
Anche la scritta è Whiff of Joy, fa parte del Winter Kit 2009.
Il nastro è Stampin Up e le bacche sono un rimasuglio dei decorazioni natalizie degli anni passati.

The stamp is Whiff of Joy from the last collection, it's "Henry Christmas Mouse" a delicious mouse which I colored with Copic.
Basic Grey papers are from Eskimo Kisses collection, they have fantastic colors.
Also the sentiment is Whiff of Joy from 2009 Winter kit.
The ribbon is Stampin Up and the berries are a remainder from last year's Christmas decorations.


Aspetto di vedere i vostri fantastici lavori.

I wait your fabulous works.

...........................................sto morendo di fame!!!!!!!! LOL

........................................... I'm really really hugry!!!!!!!!!LOL

Thanks for stopping by ^_^

Giò

venerdì 10 settembre 2010

Whiff of Joy challenge and Stampavie and More challenge

Sono qui...... non pensavo che alcuni giorni senza internet mi sarebbero sembrati così lunghi LOL
Ritorno con una novità che riguarda la dieta...... dopo una pausa (le ferie di mio marito) mi sono rimessa all'opera e ho perso un altro chilo!  Sono molto contenta ^_^
Ora passiamo ai challenge.
Questa è la card che ho preparato per il challenge della Whiff of Joy.
Il tema è : almeno due strati.

I am here....... I did not thoughth some days without the net would be so long LOL
I am back with a news regards my diet...... after a pause (my husband's vacations) i get back with the diet and I lost another Kilogram!!!!! I am really happy ^_^
Now is time for challenge.
This is the card I made for Whiff of Joy challenge.
The theme is: at last two layers.


L'immagine è colorata con i Copic ma il vestitino è realizzato con la tecnica del paper piecing.
La scritta è Whiff of Joy e fa parte della collezione Happy Mail.
Con questa card partecipo anche a questi challenges:
Sketch Saturday challenge: Sketch
Basic Grey challenge: Paper Piecing
Stamptacular challenge: Distress It

The image is colored with Copic and the llittle dress is realized with the paper piecing tecnique.
The sentiment is Whiff of Joy and it is from Happy Mail collection.
With this card I enjoy this challenge too:
Sketch Saturday challenge: Sketch
Basic Grey challenge: Paper Piecing
Stamptacular challenge: Distress It


Supplies:
Stamp: Whiff of Joy
Papers: Basic Grey Olivia collection; Colorcore cardstock
Embellishment: cotton twine, brad and buttons from Basic Grey
Tools: paper trimmer, distresser, glue dots

°°°°°°°°°°°°°°°°°°°°°°°°°°°°°°°°°°°°°°°°°°°°°°°°°°°°°°°°°°°°°°°°°°

E questa è la card che ho preparato per il challenge della Stampavie and More.
Questa settimana il tema è: scuola.

And this is the card I made for Stampavie and More challenge.
This week the theme is: School.


Ho colorato questa adorabile immagine con i Copic e ho creato il background con i Distress Ink.
I colori sono vividi e allegri e ho aggiunto alcuni bottoni anche loro molto colorati.
Amo particolarmente questa card e spero che anche a voi piaccia tanto ^_^
Con questa card partecipo anche al challenge Creative Card Crew, tema: scuola.

I colored this adorable image with Copic and I created the background with Distress Ink.
The colors are bright and vivid and I add some buttons really colored too.
I love this card and I hope like you too.
With this card I enjoy to Creative Card Crew, the theme's: school.


Supplies:
Stamp: Mo Manning digi stamp
Papers: DCWV stach Grade school, Stampin Up cardstock
Embellishment: Basic Grey buttons, Papertrey Ink ribbon, embroidery floss, Cosmo Criket stikers
Tools: Paper trimmer, 3D pad, glue dots

sabato 4 settembre 2010

Timbroscrapmania challenge # 10

Dopo la pausa estiva eccoci pronte a riprendere con il challenge di TIMBROSCRAPMANIA.
E per riprendere con relax, non vi mettiamo alcun vincolo, siete libere di fare quello che volete.
Scegliete i colori che volete, lo sketch o qualunque altra cosa e sbizzarritevi.
Stupiteci con la vostra creatività.
E questa è la card che ho preparato per questa occasione.

After the Summer pause, now we are ready to get back with
 TIMBROSCRAPMANIA challenge.
And to get back with relax, we don't give you any rules, chose the colors, the sketch or whatever else and let your fantasy go.
And this is the card I made for this occasion.


Il timbro Magnolia fa parte dell'ultima collezione "Bon Voyage" e per colorarlo ho usato i Copic.
Le carte sono Magnolia e  BG collezione Kioshi. Con una folder Tim Holtz ho embossato la carta Magnolia che poi ho distressato con il sand block.

Magnolia's stamp is from the last collection named "Bon Voyage" and to color it I used Copic.
The papers are Magnolia and BG from Kioshi collection. With a Tim Holtz folder I embossed Magnolia paper which I distressed then with sand block.


Per il volo di farfalle ho usato una punch della Martha Stewart e per colorarle ho usato i Distress Ink (Victorian Velvet & Shabby Shutters) applicati con le spugnette da dito.
La scritta fa parte di un set della Inkadinkado.

For the flying butterflies I used a Martha Stewart punch and to color them Distress Ink sponged with a sponge daubers. The sentiment is from Inkadinkado set.


I fiori Prima Marketing hanno piccoli tocchi di colore e una brad di velluto (Stampin Up)

The Prima Marketing flowers have little touch of color and a corduroy brad (Stampin Up).


Aspettiamo di vedere le vostre belle creazioni!!!

We wait to see your beautiful creations!!!

Thanks for stopping by.

Giò

giovedì 2 settembre 2010

Whiff of Joy new release

Ciao!!!!!
Oggi vi voglio mostrare una card che ho fatto usando il kit di Settembre della Whiff of Joy, in vendita da ieri.
Trovo che sia un kit davvero bello e vi mostrerò altri lavori realizzati con questo kit.
Hi all!!
Today I show you my last card realized with September kit from Whiff of Joy, on sale from Yesterday.
I think it's a wonderful kit and I will show you a few of works realized with this kit in the next time.


Ho scelto la Madonnina china sulla culla del bambinello, questa immagne è di una dolcezza unica.
Le immagini sono colorate con i Copic.

I chose the Vergin and the Little Child, this is a really sweet image.
I colored it with Copic.


Tutta la card verte sul rosso e sul celeste/acqua.
La carta quadrettata è della Magnolia e la carta celeste acqua non ricordo ... scusate.
Naturalmente anche la scritta fa parte dello stesso kit.

The colors of this card are red and aqua. 
Red ghingam paper is from Magnolia and the aqua paper  I don't remember.... I'm sorry!!!
Of course, the sentiment too is from Whiff of Joy September kit.


Il mazzolino di fiori l'ho realizzato con roselline di due colori e foglie di edera, è arricchito da una bellissima perla e legato con del cordino bianco.

The bouquet is made with roses and ivy leaves,  is enriched with a beautiful beads and bound with a white twine.


Non è mai troppo presto per pensare al Natale....... vero??

It's never too early to think Christmas... right?

Thanks for stopping by

Giò

mercoledì 1 settembre 2010

Tutorial per Whiff of Joy Inspirational blog

Ciao a tutti!!!
Ecco un piccolo porta cioccolato per Halloween.

Hi all!!!
Here is a little Halloween treat box.


Avrete bisogno di:

You will need:
Halloween Whiff of Joy stamps, on sale on September 1st.
Cutting machine
Score board
5 x 11 1/2 piece black cardstock
3 7/8 x 2 7/8 piece patterned paper
2 7/8 x 2 piece patterned paper
scissors
souble sided tape
ribbon
buttons

Piegare il cartoncino a 1/2 - 1 - 4 - 4 1/2
Score the black cardstock at 1/2 - 1 - 4 - 4 1/2

Ruotate il cartoncino e piegate a 4 - 4 1/2 - 9 -9 1/2
Rotate the cardstock and score at 4 - 4 1/2 - 9 - 9 1/2

Tagliate i pezzi segnati in bianco.
Cut pieces marked with white pen


 Mettete il nastro biadesivo sui lati come nella foto.
Put the double sided tape as in the photo

Incollate per creare il box e con le forbicine tagliate l'eccesso.
Stick to create the box and with a scissors trim off the excess.

Incollate la patterned e decorate come vi piace.
Stick the patterned paper and decorate them as you like.

Fate due buchi dove inserire il nastro per la maniglia.
Make two holes for the handle and insert the ribbon.

Per la chiusura potete usare del velcro.
For closing the box you can use the velcro.

Spero che questo piccolo tutorial vi sia piaciuto.
I hope you like this little tutorial, thanks for stopping by.

Giò


lunedì 30 agosto 2010

Tutorial per Whiff of Joy Inspirational blog

Avete voglia di tutorial....... eccolo qua!!!!
Ho fatto questo tutorial per Whiff of Joy Inspirational blog, dovete solo clikkare sul link.

Do you want a tutorial..... here is for you!!!!
This is a tutorial for Whiff of Joy Inspirational blog, simply clik on the link.


Questa deliziosa streghetta fa parte della collezione di timbri Whiff of Joy che sarà in vendita dal 1° Settembre. Per colorarla ho usato i Copic. La carta è Basic Grey.
 
This super cute little witch is a new Whiff of Joy stamp on sale on 1° September.
I colored it with  Copic. The paper is Basic Grey.


Aspetto di sapere se vi è piaciuto

Let me know if you like it.

Thanks for stopping by

Giò

sabato 28 agosto 2010

Whiff of Joy sneak peek


Altro assagino dei nuovi timbri Whiff of Joy in uscita dal 1° Settembre e altre novità!!
Questo è il bellissimo kit di Settembre disegnato da Elizabeth Bell........ non è adorabile??
Avete la possibilità di vincerlo partecipando al candy di Katharina, la generosa proprietaria della Whiff of Joy. Andate sul suo blog e  registrate il vostro nome e il link del vostro blog su Mistery Link, dopodichè lasciate un commento specificando quale DT card vi è piaciuta di più..... facile no????
Buona fortuna a tutte!!!!!!!!!

Another sneak peek with new Whiff of Joy stamps on sale on September 1st and anothe news!!
This is a beautiful September kit illustrated by Elizabeth Bell....  isn't adorable??
You can win it with Katharina's candy, she's the generous Whiff of Joy owner.
Jump on her blog and leave your name and bloglink on Mistery Link and then leave comment telling her your favourite DT card with new stamps...... easy??
Good luck to all!!!!!

E di questa che mi dite???
Per questo assagino ho utilizzato "Sammy first Christmas".

What about do you think??
For this sneak peek I used "Sammy first Christmas".


Colorata con i Distress Reinkers e ritagliata con le Nestabilities.
Le carte sono della Fancy Pants e i bottoni a mo' di palle di Natale sono Papertrey Ink.

I colored it with Distress Reinkers and I cut it with Nestabilities.
The paper is Fancy Pants and the buttons, as Christmas bauble, are Papertrey Ink.


Anche la scritta è Whiff of Joy ed è venduta insieme a questo delizioso timbro.
L'ho montata su una decorazione per l'albero realizzata con una Punch Stampin Up.
Il charm fiocco di neve è ancora Whiff of Joy.

The sentiment is Whiff of Joy too, it's on sale with this lovely stamp.
I stamped it on a Christmas bauble punched with a Stampin Up puch.
The snowflake charm is Whiff of Joy too.


Vi è piaciuto questo nuovo assaggino???
Ciao a tutte e a presto.

You liked the sneak peek?
Hello to all and see you soon.

Thanks for stopping by

Giò