Visualizzazione post con etichetta Box. Mostra tutti i post

giovedì 16 dicembre 2010

Stampavie & More challenge

Ecco il lavoro preparato per il challenge della Stampavie & More.
Il tema di questa settimana è: FACCIAMO UN REGALINO!!

Here is a work I made for Stampavie & More challenge.
This week's theme is: MAKE A GIFT!!


Ho fatto una scatolina con le ali.... come ha detto mio nipotino!!!! e una piccola card abbinata.
Tutto il materiale per realizzare questo lavoro lo potete trovare da TIMBROSCRAPMANIA

I made a Wings Box..... as my nephew says!!!! and a little card.
You can find all materials for this work on TIMBROSCRAPMANIA


Ora vi auguro buona giornata e corro a prepararmi per uscire, ho ancora un sacco di regalini a cui pensare.........
come mi diverto amiche mie!!!!!!!!

Now  I wish you a wonderful day and go,  I still have a lot of little Christmas gifts to think about.............
I enjoy it so much my friends
Thanks for stopping by
Giò


Materials
Papers: Maja Design
Stamps: Magnolia Lazy Summer Tilda, Papertrey Ink sentiment;
Mediums: Memento Tuxedo Black; Copics; Stickles Crystal Ice;
Tools: Big Shot, Magnolia Doohickeys Tilda Lace, Magnolia Doohickeys Angel Wing, Nestabilities circles.

martedì 16 novembre 2010

Tutorial per Whiff of Joy Inspirational blog

Buongiorno care amiche!!!!
Su Whiff of Joy Tutorials & Inspiration blog trovate il tutorial step by step per la realizzazione di questo delizioso  "Pizza mini box" ,una piccola scatolina all'interno della quale trovano posto 4 piccole cards.
Può essere una bella idea regalo per il prossimo Natale, ma in realtà può essere utilizzata per qualunque occasione, in questo post di qualche tempo fa, potete vedere un'altro esempio.

Good morning dear friends!!!!
On Whiff of Joy Tutorials & Inspiration blog you can find the step by step tutorial to make this cute "Pizza mini box", it's a little box with 4 little cards.
This is a nice gift idea for the next Christmas, but in effect you can use it for every occasion, here, you can see another example.


Spero che avrete voglia di andare a dare un'occhiata a questo tutorial e anche che avrete voglia di farmi sapere cosa ne pensate, io sono qui che vi aspetto!!!

I hope that you will want  take a look on this tutorial and that you will want let me know what do you think about it, I'm here and wait you!!!

Thanks for stopping by

Giò

domenica 24 ottobre 2010

Box with divisors for Christmas tags tutorial

Ciao a tutti da Giò!!!
Oggi vi voglio mostrare come realizzare una scatola con divisori che conterrà delle tag natalizie.

Hi all, here is Giò!!!!
Today I want to show you a tutorial to make a box with divisors that conteins a lot of Christmas tags.

Avrete bisogno di:
You will need:
Whiff of Joy  Cute Donkey for the sentiment;
Whiff of Joy Noel sentiement from October Store Kit;
Kraft and Ivory cardstock;
1 sheet Acetate;
Memento Tuxedo Black; White Ink; Copic Markers;
White embossing poweder; Heat tool;
Double sided tape; Glue Dots;
Ribbon; Charm; Button; white and kraft wire;
Paper trimmer, Score Board; Big Shot, Scissor.

Ora siete pronte!!!
Now you are ready!!!!


Ho decorato la base della scatola con alcune timbrate in bianco.
I decorate the bottom of the box with some stamps stamped in White.
Mettete un piccolo pezzetto di biadesivo sulle alette.
Put a little bit of double sided adhesive on the little tags.
Capovolgete il cartoncino e attaccate il biadesivo sui quattro bordi.
Turn the cardstock over and attach the double sided adhesive on the four borders.
Prima di tutto attaccate le piccole alette e poi gli altri lati due a due.
First of all attach the little tags and then attach the other sides two by two.

Ora facciamo i divisori.
Now we make the divisors.


Dopo aver piegato i cartoncini, mettete del biadesivo come nelle foto.
After scoring, put the double sided adhesive as in the photos.

Adesso possiamo inserire i divisori nella scatola.
Now you can insert the dividers on the box.
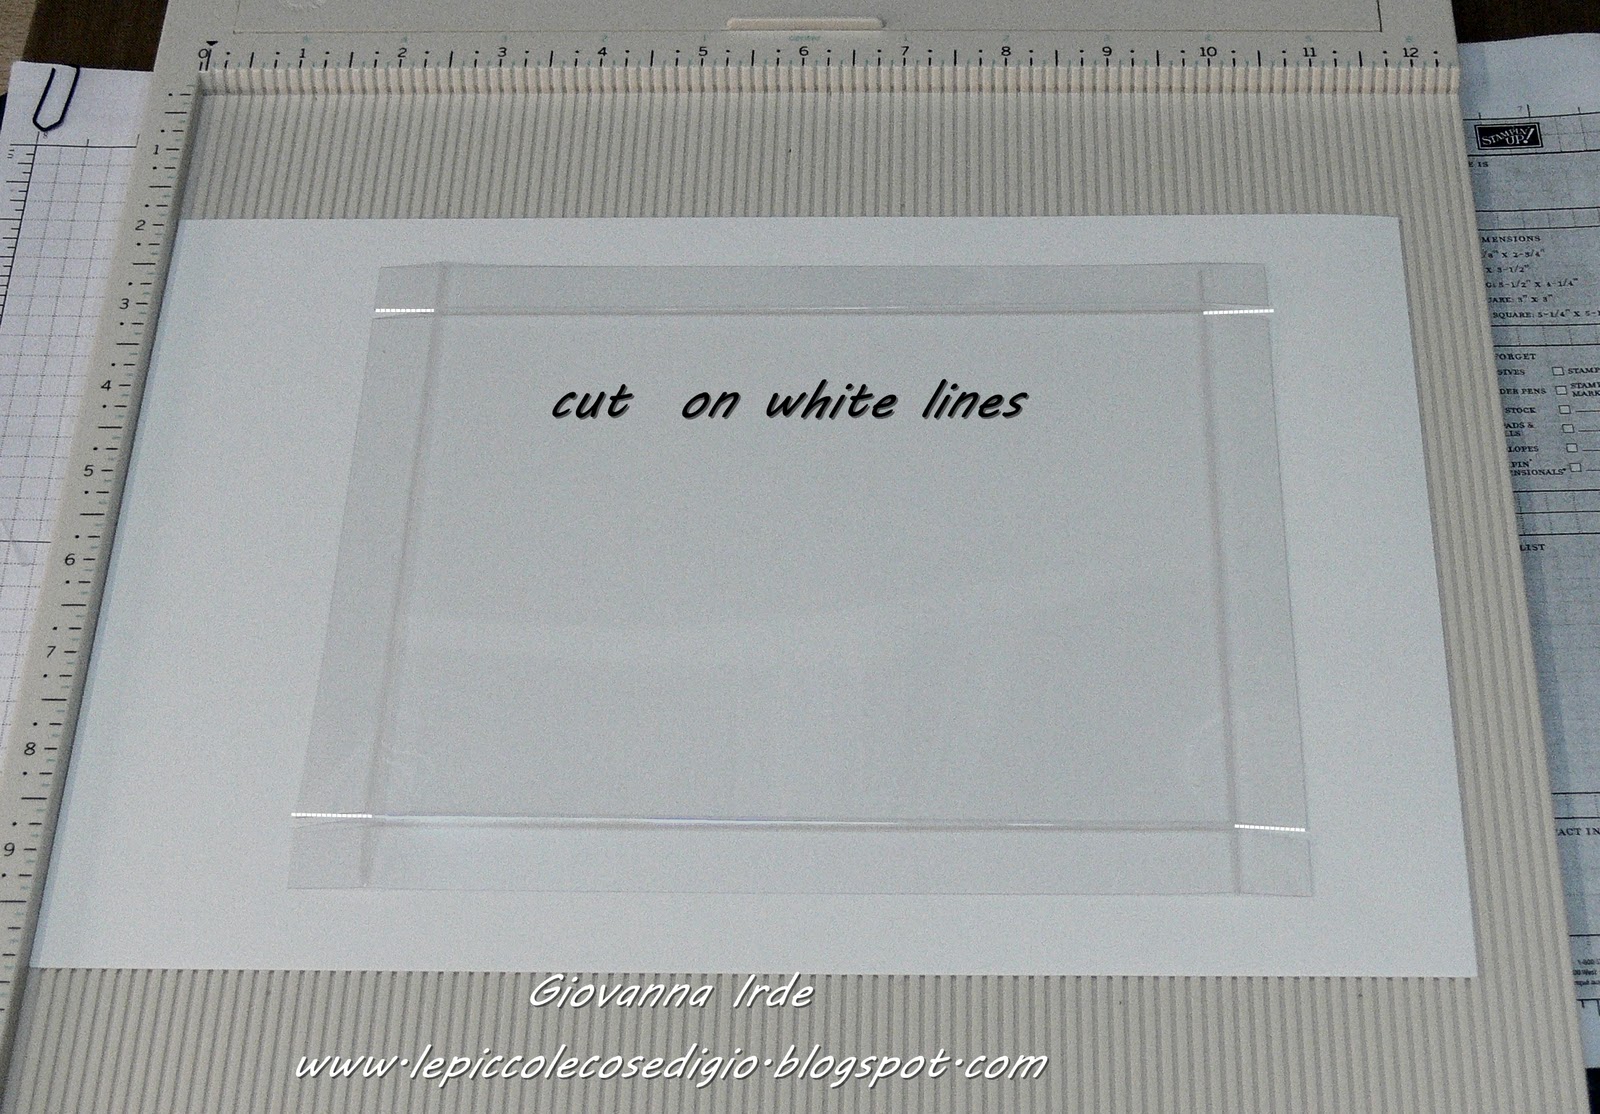
Per il coperchio, usiamo un foglio di Acetato.
For the top of the box, used a sheet of  Acetate.

Per chiudere i bordi ho usato i Glue Dots.
To attach the borders of this top I used a Glue Dots.

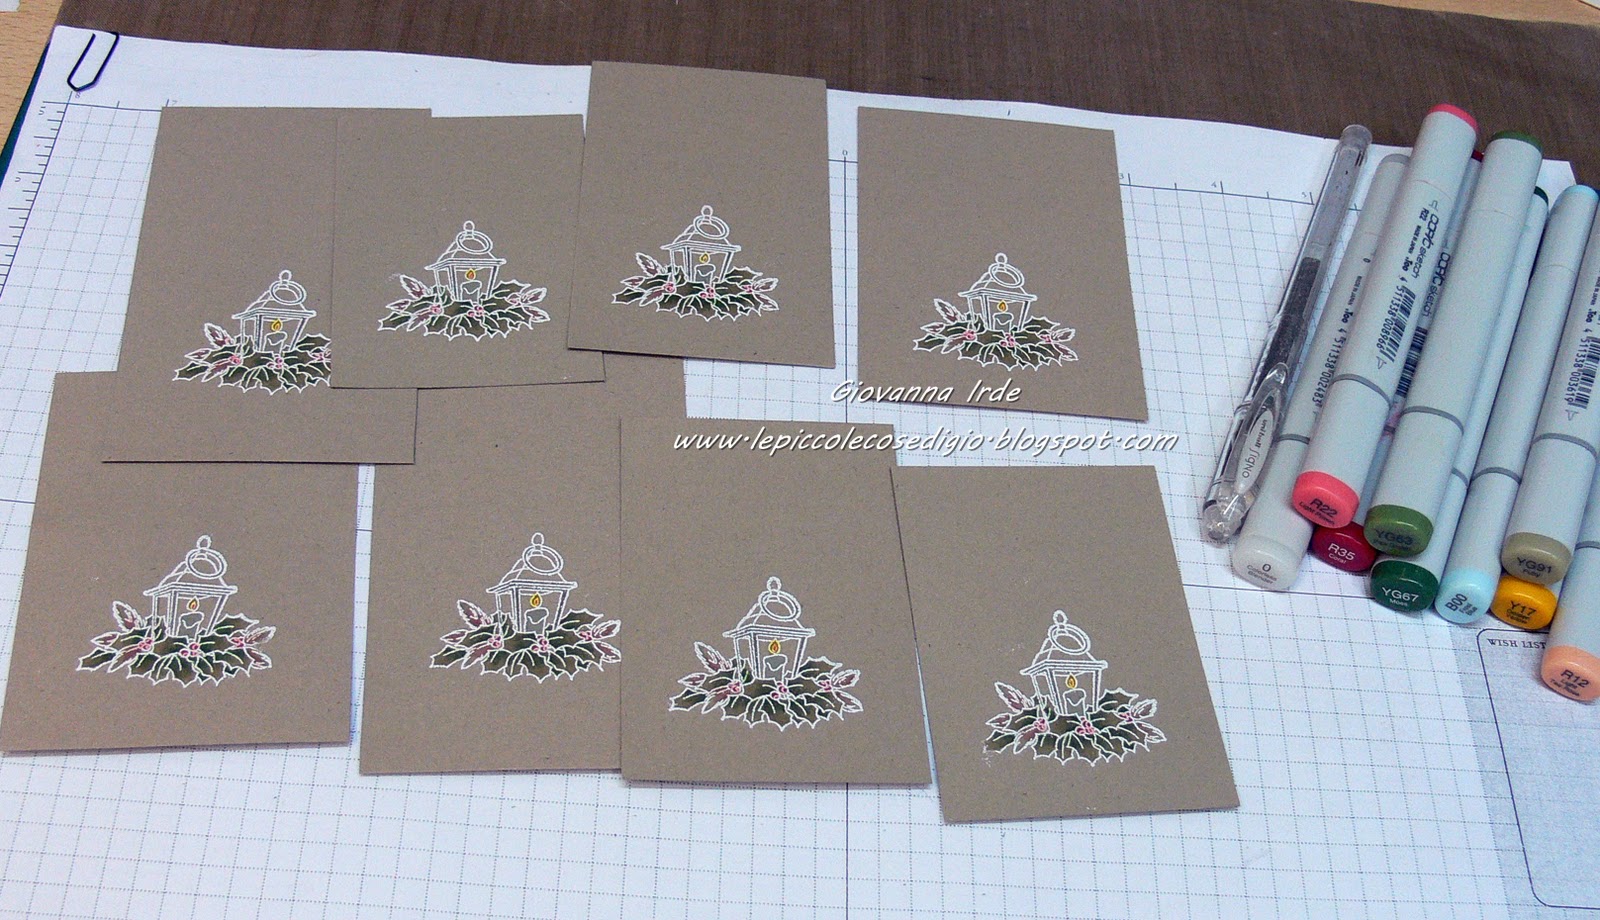
Ho fatto 8 tags Kraft e 8 Avorio.
Stampate in bianco sul Kraft e in nero sull'Avorio e poi colorate con i Copic Markers.
I made 8 tags Kraft and 8 tags Ivory.
Stamp in White on Kraft and in Black on Ivory and then color with Copic Markers. 


Posizionate la parte di plastica trasparente sul cartoncino e fate due puntini dentro i fori della plastica.
Position the clear plastic on cardstock and make two dots on the holes on the plastic.
Fate coincidere i puntini con i buchi sulla die in metallo e tagliate con la vostra macchina da taglio.
Adjust the marks with the holes on the metal die and cut with your cutting machine.

Con un piccolo pezzetto di cordino le vostre tag  sono complete, non dovete far altro che sistemarle nella scatola.
Ho decorato il top della scatola con dei nastri e un fiocco dal quale pende un ciondolo, ho anche aggiunto una tag fatta con la Fancy Shape die e la scritta fa parte dello store Kit di Ottobre.

With a little piece of natural wire your tag are completed, you don't have to do nothing only put them in the box.
I decorate the top of the box with ribbons and a bow, I also add a tag made with the Fancy Shape Die, the stamp is from Season's Greeting kit.
Spero che questo tutorial sia chiaro e semplice e che vi piaccia.
I hope this tutorial would be simple and clear for you and I hope you will like it.
Thanks for stopping by.

Giò

venerdì 22 ottobre 2010

Tutorial per Whiff of Joy Inspirational blog


BUONGIORNO!!!!!!!!!!!!
Buone nuove oggi......  come prima cosa vi dico che sono molto felice perchè ho perso altri chili, circa 3 e mezzo..... URRA' per me!!! Nell'ultimo periodo ho lavorato come una pazza con orari impossibili e carichi di lavoro allucinanti, è stata comunque un'esperienza stimolante con la quale mi sono messa alla prova, ma soprattutto...... ho perso ancora peso.... ancora non ci credo ^:^
L'altra bella notizia è che ho appena postato un tutorial su Whiff of Joy Inspirational & Tutorial Blog.
E' un lavoro molto articolato che mi ha portato via tanto tempo, ma il risultato ne valeva la pena, spero che vi piaccia quanto piace a me!!!!
Le foto qua sotto sono dei dettagli del lavoro, ma per tutti i dettagli i materiali e lo step by step fotografico, andate qua e poi fatemi sapere cosa ne pensate!!!!
In ogni caso se ci sono dei punti che non vi sono chiari o avete delle curiosità, sarò lieta di rispondere alle vostre domande!!

GOOD MORNING!!!!
Good news today...... first of all I want to say you that I have lost some kilos again, about 3 and 1/2..... HURRA'  for me!!!!!In the last time I worked foolish until crazy hours with crazy charges of work, but it has been an inspiring experience, and above all...I lost weight again ...I cannot believe it ^.^
The other beautiful news is that I just posted my tutorial on Whiff of Joy Inspirational& Tutorial Blog. It is an articulate work, but it worth it, and I hope you will like it as I like it!!!
The picture here are some details of the work, but for all the other details and the photo step by step, go there and tell me what do you think about!!!
In all cases, if there are some unclear points or you have some curiosities, I will be happy to reply on your questions!!

E' una scatola con dei divisori che contiene delle tag per i regali di Natale. Ho scelto dei colori neutri per le basi e poi ho colorato con colori natalizi, vista anche l'immagnine!!!

It's a box with divisors that contains some Christmas tags. I chose neutral colors for the bases and then I colored with Christmas colors as the image request!!


Vi lascio sperando che andrete a dare un'acchiata a questo tutorial e ringraziandovi ancora una volta per le vostre visite e i vostri commenti, sempre puntuali e attenti a tutte le novità.

I leave you hoping you will go to take a look on this tutorial and thanking you one more time for your visits and comments, always accurate and careful to all news.

Thanks for stopping by

Giò