martedì 24 maggio 2011

Whiff of Joy Summer kit dt for Mojo Monday


Buongiorno a tutti!!!! Finalmente sono tornata casa mia......... la mia adorata casetta!!!!
Mi siete mancate tanto e mi è mancato tanto creare!!!
Vi ringrazio di cuore per tutti i bellissimi commenti che mi avete lasciato, questa settimana spero troverò il tempo di andare in giro per blogland a vedere quante belle cose mi sono persa ........
Nel frattempo, come potete immaginare appena tornata a casa, tra milioni di bucati da fare e arretrati vari, mi sono messa subito al lavoro ed ecco qui la prima card di questa settimana, che sarà piena zeppa di lavori.
Ho seguito lo sketch del Mojo Monday challenge, adoro i loro sketch.

Good morning to all!!!! Finally I go back at home......... my beloved little house!!!!!
You miss me a lot and I miss you to create!!! Thanks with the heart for all beautiful comments you leave me, this week I hope I will find the time to go all around in blogland to see how many beautiful things I lost.....
Meanwhile, as you can imagine, I have a long backlist but anyway I come back to create and this is the first card for this week that will be full of works.
For this card I used Mojo Monday challenge, I love their sketches.


L'immagine è Whiff of Joy e finalmente posso mostrarvela, fa parte del Summer Kit, chi l'ha ordinato, sa che ha tante immagini e scritte una più bella dell'altra.
Per la colorazione ho usato i Copic e le carte sono October Afternoon. Mi piacciono molto questi colori vivaci e allegre. Sugli occhiali  ho usato il Diamond Glaze, un gloss molto bello, mi dispiace che non si veda l'effetto.

The image is Whiff of Joy and finally I can show you,  it's a part of Summer Kit. Who ordered it knows it has  a lot of images and sentiments absolutely lovely.
For the colouration I used Copic Markers and the papers are October Afternoon. I love these colors so bright and funny. On the glasses I used Diamond Glaze, it's a fabulous gloss, I'm sorry that you do not see the effect.


Anche il sentiment fa parte del Summer kit, in realtà è scrtto su una riga sola  ma l'ho scritto dividendolo in tre righe per adattarlo alla forma del cerchio.
Per tagliare il cerchio ho usato una punch da 2 1/2" e una punch Stampin Up per il cerchio scallopato.
Anche il nastro è Stampin Up e poichè è un po alto, l'ho diviso con le forbici alla misura che mi serviva.
Le mezze perle, che trovate in diversi colori,  sono una novità di questo mese della Whiff of Joy.

The sentiment also is a part of Summer kit, in fact it's on a single line but I have divided it into three lines to fit the shape of the circle.
To cut the circle I used a 2 1/2" EK Success punch and a Stampin Up punch for the scallop circle.
Also the ribbon is from Stampin Up and as it is a bit high, I cut it with scissors to the size I needed.
The half pearls are a new May release from Whiff of Joy, you can find them in many colors.


Come sempre mi auguro che la mia card vi piaccia e vi lascio per andare a fare qualcosa di meno creativo ma assolutamente necessario dopo una settimana di assenza....... pulire casa!!!!
Felice giornata!!!!!

As always I hope my card will like you,   I leave you and I go to do something less creative but absolutely necesary after a week of absence......... clean my home!!!!
Have a fabulous day!!!

Giò

sabato 21 maggio 2011

Timbroscrapmania challenge!!!!!


Buongiorno a tutti e buon Sabato!!!!
Come state, spero bene!!! Oggi non vedevo l'ora di postare per farvi vedere questo lavoro!!!
L'ho realizzato per il challenge TIMBROSCRAPMANIA!!!! Il tema scelto da Lina è: RICETTE!!!
Che ne dite del mio portaricette calamitato??? Lo adoro!!!!!

Good morning to all and happy Saturday!!!!
How are you? I hope fine!! Today a can't wait the time to post to show you this work!!
I realize it for TIMBROSCRAPMANIA challenge!! The theme chose from Lina is: RECIPES!!!
What do you think about my magnetic recipe box??? I love it!!


Come potete vedere adoro anche il mio frigo!!! LOL
Per questo progetto ho creato un contenitore rettangolare usando un cartoncino pesante.
Ho rivestito la scatolina con la bellissima carta Maja Design tranne il retro.
Poi ho colorato con i Copic una dolcissima Tilda cuoca e l'ho seduta su un mattarello.
Sono proprio contenta di come ho colorato questa immagine.
Un nastro spigato gira intorno a questa scatolina fermandosi sul davanti con un nodo.
Sul nodo ho fissato un bottone al quale ho legato un delizioso ciondolo, poi lo spillo di Tim Holtz inserito proprio nel nodo del nastro regge la piccola tag che ho ritagliato dal timbro delle riceette.

As you can see I love my fridge too!!!! LOL
For this project I created a rectangular box using a thick cardstock.
I covered the box with the beautiful Maja Design papers except the back.
Then I colored my sweet chef Tilda sitting on a rolling pin, with Copic: I am very satisfy for this colouration.
A twill ribbon goes around the box and I add a large button on the knot. On the button I add a lovely charm.
Then I put into the ribbon's knot a Tim Holtz pin with a little tag that I cut from the large recipe stamp.


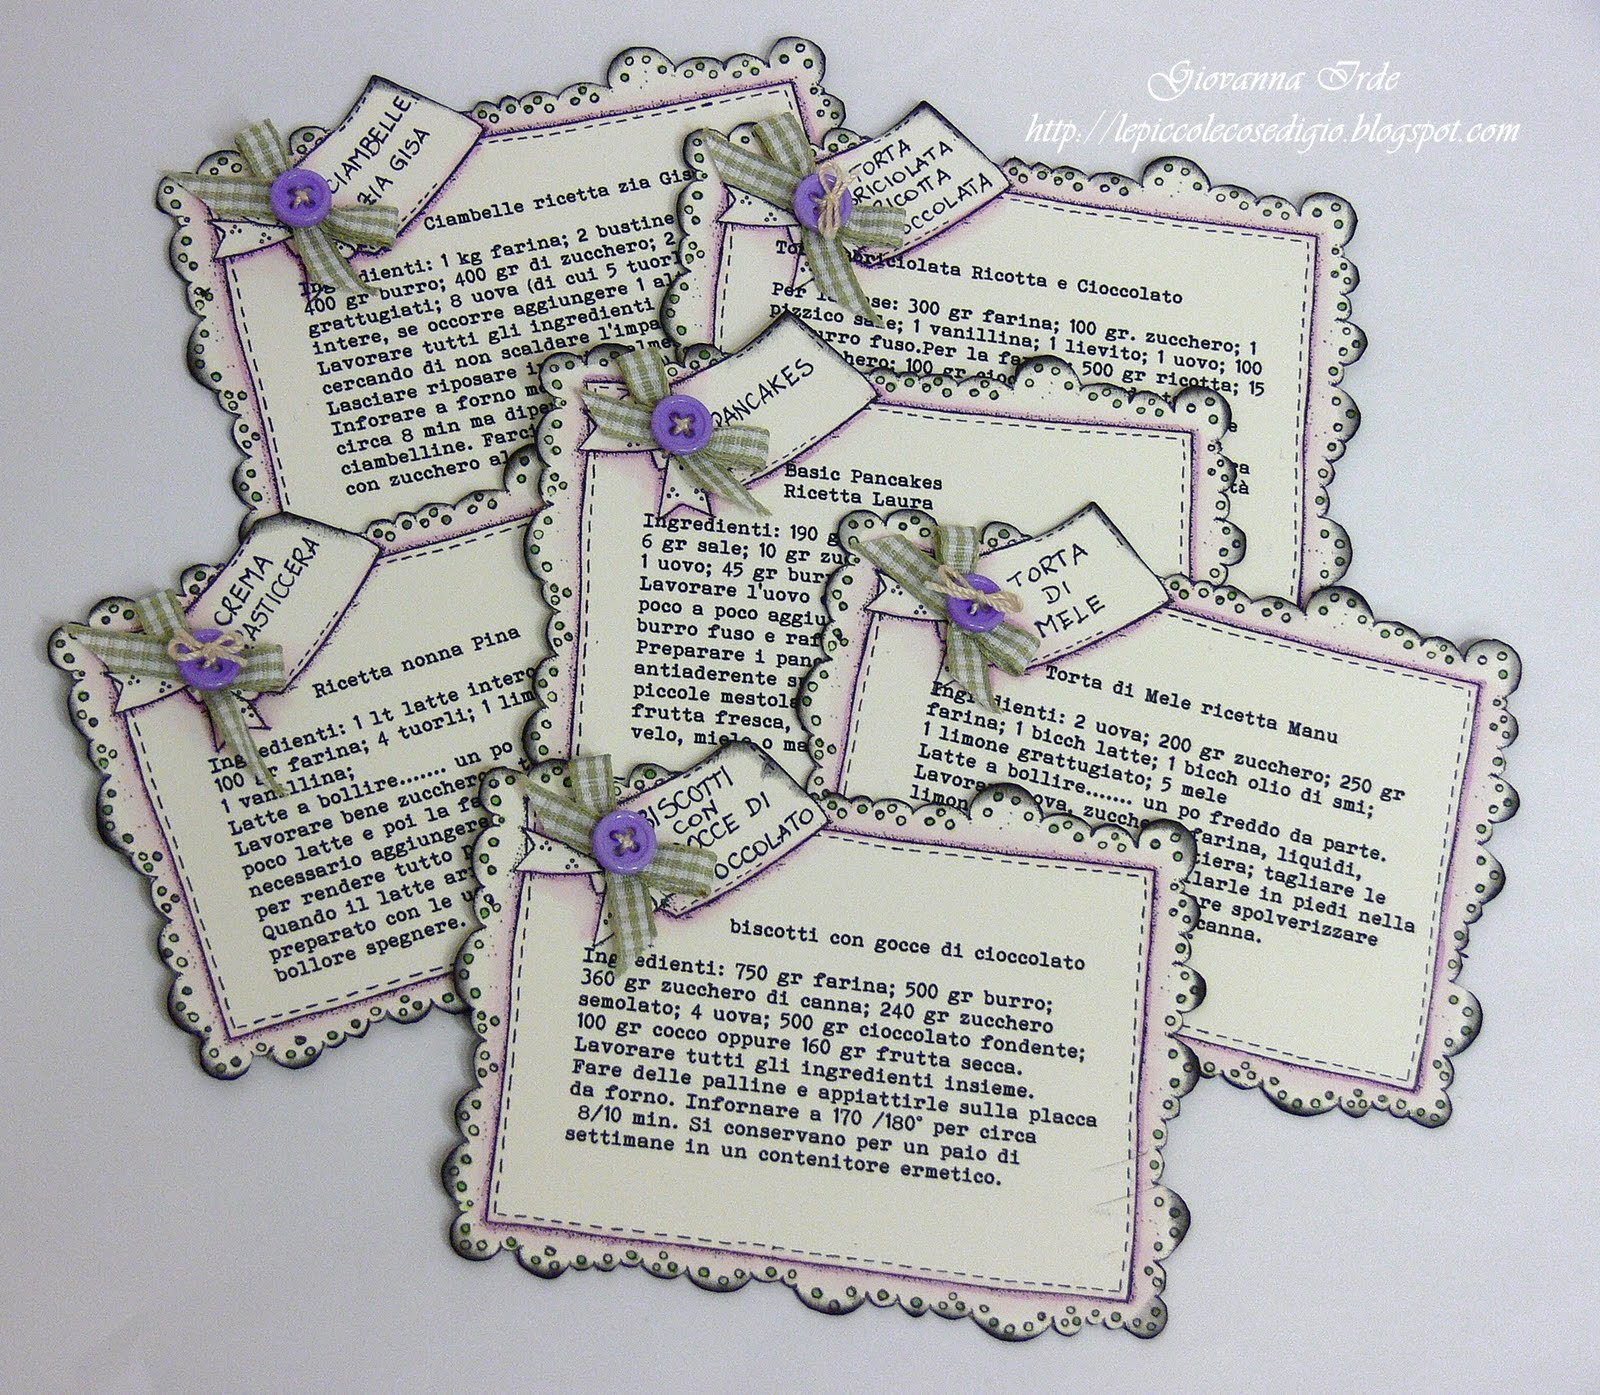
Per le ricette ho usato un bellissimo timbro Magnolia al quale ho tagliato la parte interna con le righe....... se tagliate con precisione non rovinate il timbro e le parti conicideranno per poterlo usare di nuovo completo. Per tagliare il rubber io mi trovo benissimo con le forbici di Tim Holtz, sono proprio uno di quegli attrezzi irrinunciabili. Anche le ricette hanno una leggera colorazione con i Copic e sono sfumate tutto intorno con il Black Soot Distress Pad.
Ho pensato di rendere magnetica anche la Tilda in modo tale da poter tenere ferma la singola ricette........ carina come idea vero?? Per fare questo ho usato una piccola calamita della Basic Grey. Una parte è incollata sotto la Tilda e l'altra parte è incollata sotto il mattarello.

For the recipes labels I used a beautiful Magnolia stamp, but first I cut the inside....... if you made a precision cut you don't cause damage to your stamp and the inside and the outside will fit so you can use it uncut again. To cut the rubber I use Tim Holtz scissor, a fabulous tool that I love.
Also the labels recipe are colored with Copic and distressed on each edge with Black Soot Distress Pad.
I thought that the Tilda could be magntic too so it can hold the single recipe........ cute as idea, isn't it?? To do it I used a little Basic Grey magnet. A part is stick below the Tilda, the other on the rolling pin.


Ho deciso di sfruttare anche il retro delle ricette, un po perchè non mi piaceva l'alone del colore lasciato dai Copic, un po perchè mi piace l'idea di creare uno spazio per le note legate a ogni ricetta.
Quindi dopo aver ultimato il fronte della ricetta, ho incollato un cartoncino Kraft sul retro e con santa pazienza ho ritagliato di nuovo tutto il contorno. Le righe e la scritta Notes sono timbri Papertrey Ink, la pera, la mela e le posate sono Magnolia.

I decided to use also the back of the recipes; I didn't like the mark left by Copic and I like the idea to create a space for notes for every recipe.
So, after I finished the front of the recipe, I stick a Kraft cardstock on the back and with holy patience I cut all around again. The lines and the sentiment Notes are Papertrey Ink stamps, the pear, the apple and the cutlery are Magnolia.

 Questo è il retro del box e il retro della Tilda. Per la scatolina ho usato la calamita in rotolo, moltoooo comoda.

This is the back of the box and the back of the Tilda. For the box I used the magnet in roll, sooooooo confortable.
Questa è la visione d'insieme del fronte delle ricette.

This is the entire vision of the front of the recipes.
 E questa è la visione d'insieme del retro delle ricette.

And this is the entire vision of the back of the recipes.

Grazie per essere arrivati alla fine di questo lunghissimo post.
Spero che il mio lavoro vi sia piaciuto e che vi abbia dato qualche idea.
Buon fine settimana a tutti!!!!!!!!!

Thank you to arrive at the end of this long long post.
I hope my work liked you and gave you same ideas.
Happy weekend to you all!!!!!!!!!

Thanks for stopping by

Giò

martedì 17 maggio 2011

Tri-shutter card with Stampalicious Lili!!!


Buongiorno a tutti!!!
Oggi vi mostro una tri shutter card realizzata con la deliziosa "Stampalicious Lili" di Inky Impression.
Se volete potete trovare il tutorial per realizzare questa card QUI.
Volevo dirvi care amiche che questa settimana sarò fuori casa e non avrò la possibilità di usare internet......... come farò a sopravvivere?? LOL, Ad ogni modo, non potrò rispondere alle vostre mail o lasciare commenti, prometto che lo farò al mio ritorno......... naturalmente sarà una gioia leggere i commenti che vorrete lasciarmi.

Good morning to all!!!
Today I want show you a tri shutter card with lovely "Stampalicious Lili" from Inky Impression.
You can find the tutorial to realize this care HERE.
My dear friends I want let you know that I don't  will be at   home this week and I don't will have internet........ I don't know how  I will survive!!! LOL. Anyway, I can not answer your emails or leave comments around but I promise you that I will do it when I back at home......... of course I will be really happy to read your comments.


Ho usato le fantastiche carte Cosmo Cricket della collezione Pixie-Licious.
L'immagine è colorata con i Copic e incollata con biadesivo spessorato sul cartoncino Kraft tagliato con una Nestabilities, in questo caso si tratta della Label Eleven 
Ho tagliato i fiori con una piccola punch e ho aggiunto una brad con lo strass.

 I used the fabulous Cosmo Cricket papers from Pixie-Licious collection.
The image is colore with Copic and stick with 3d dots on a Kraft cardstock that I cut with a Nestabilities, in this case I used the Label Eleven
 I cut the flowes with a little punch and I addo on each flower a rhinestone brad.

Il sentiment è stampato ed embossato in bianco e per tagliarlo ho usato un'altra bellissima Nestabilities.
Infine ho fatto una finta cucitura con la penna gel Bianco.

The sentiment is stamped end embossed in White, to cut it I used another beautiful Nestabilities.
Finally I made a faux stitch with a White gel pen.


Per oggi è tutto, spero che la mia card vi sia piaciuta!!!!!
E anche se questa settimana non ci sarò, ho programmato alcuni altri post ......... quindi a presto!!!!!

It's all for today, I hope you will like my card!!!!!
 And even if this week I will not be there, I planned some other posts ......... so....see you soon !!!!!

Thanks for stopping by

Giò

sabato 14 maggio 2011

Basic Grey challenge #44


Buongiorno a tutti e buon Sabato!!
Oggi c'è il challenge Basic Grey e il tema che vi proponiamo è:  MIX & MATCH!!!
Frugate tra i vostri prodotti Basic Grey e mixate diverse collezioni tra loro......... stimolante vero??
E non dimenticate il premio, un buono da $25 messo in palio dal nostro unico e generoso sponsor
SIMON SAYS STAMPS.

Good morning to all and Happy Saturday!!!
Today we have Basic Grey challenge and the theme we propose you is: MIX & MATCH!!!We would love to see a mix of your BasicGrey products, papers - buttons and anything you have that is BG- all mixed up please!!
As usually our SIMON SAYS STAMP generous sponsor , is offering a $25 shopping voucher for one lucky winner.


La card che vi mostro oggi mi piace moltissimo, sarà perchè adoro il Viola o forse perchè questa Tilda è dolcissima, ma sopratutto perchè mi sono divetita a mixare le carte Basic Grey di varie collezioni.
Le carte vengono dalle collezioni Wisteria (il fondo fiorito), Kioshi ( Lilla e Celeste acqua) e Curio (Giallo sole). I bottoni sono Kioshi (Lilla) e Hopscotch (Azzurro).
Per la Tilda con il palloncino ho scelto la colorazione con i Copic, sotto la firma trovate l'elenco di quelli usati.

Today's card I like really much, probably because I love Purple and maybe because this is a sweet Tilda but
especially because I had a lot of fun to mix Basic Grey papers from Wisteria (background), Kioshi (Lavander and Acqua) and Curio (Yellow sun) collections. Buttons are from Kioshi and Hopscotch collections.
For this Tilda with ballon I chose Copic coloration, below you can find the list.


Il sentiment l'ho scelto perchè mi piace tanto questa filosofia di pensiero che sento molto mia anche se a volte non è facile. La scritta è stampata ed embossata in Bianco. Stranamente mi sono molto divertita con i fiori, che come avrete notato, non sono un abbellimento che uso con naturalezza, mi contraddistinguono molto di più i bottoni che uso un po dapperttutto, ma in questa card li ho usati con facilità. Inoltre su tutti i fiori ho usato un tocco leggero di Stickles, che da una luce davvero speciale e se ci sono i fiori non possono mancare le farfalle per le quali ho usato una punch MS.

I chose this sentiment because I love this idea that I feel absolutely mine, although sometimes it is not easy. The text is stamped and embossed in White. Curiously, on this card I had much fun to with flowers, as you noted are not an embellishment that I comes natural to use, I characterize a lot more buttons that I can put everywhere, but in this card I was able to use the flowers very easily!!
In addition to all the flowers I used a light touch of Stickles, who has a very special light and if there are flowers can not miss the butterflies for which I used a Martha Stewart punch.


Ora vi lascio e vado a controllare la cottura del mio pollo ripieno....... mhhhh ho già una fame!!!!
Felice fine settimana a tutti!!!

Now I leave and go to check my stuffed chicken ....... Mmm I am hungry!
Have a fabulous weekend!!

Thanks for stopping by

Giò


Supplies list
Stamps Tilda with ballonHero Arts (sentiment)           
Papers  Basic Grey 6x6 paperpad Wisteria - Kioshi - Curio / Black cardstock
Copic Used Skin E000/11/21/R20 - Hair C3/5/7/9 - Dress V000/12/15/17 - Shoes C9/7/5 - Sky B000/00/01 - Green E25/ YG91/93/95
Embellish Flowers from Wild Orchid Craft - Pin from WOJ - Buttons from Basic Grey -  Platinum Stickles - Ribbon and charm from my stash

venerdì 13 maggio 2011

Sketchalicious challenge!!!!


Finalmente Blogger ha ripreso a funzionare!...... anche se ha cancellato tutti i commenti dell'ultimo post :(
Quindi, eccomi qua a farvi vedere l'ultima card realizzata!!!
Lo sketch che vi proponiamo per questo challenge di Sketchalicious mi ha ispirato a fare una card un po diversa dal solito e vi dico che il risultato mi piace..........
Ecco qua le foto, l'elenco del materiale lo trovate sotto la firma!!!
Buona serata a tutti e salvo ulteriori complicazioni con Blogger ci vediamo domani con un altro lavoro!!!

Finally Blogger solved its problems!....... but cancelled all comments to my last post :(
So, here I am to show you my latest card!!
The sketch we propose for Sketchalicious inspired me to make a card a bit different from usually and I can say you that I like it.....
Here is the photos, you can find the supplies list below.
Good evening to all, I hope will see you tomorrow for another card........ if Blogger run!!!


Thanks for stopping by

Giò


Supplies list

Stamps                Stampin Up - American Crafts
Papers                 Jillibean Soup - My mind's Eye - Black cardstock
Embellish            Buttons and Safety pin from Stampin Up - Ribbon
Medium               Multiliner Black marker Copic - Chestnut Roan by ColorBox
Tools                   Paper trimmer - Corner punch

mercoledì 11 maggio 2011

Whiff of Joy DT meets Whiff of Joy challenge


Sono di nuovo qui!!!!!
La card che vi presento ora è per il challenge Whiff of Joy!!
Per questo challenge vi proponiamo una combinazione di colori:
ACQUA - ROSA - CREMA
Bello vero??

I am here again!!!!
The card I show you now, is for the Whiff of Joy challenge!!
For this challenge we propose you a color combo:
AQUA - PINK - CREAM
Isnt'n this too cute??


Con questo timbro ho scatenato il romanticismo che c'è in me!!!!
E' "Forever in love" una novità di Maggio della Whiff of Joy.
 Per colorarlo ho usato i Copic e per lo sfondo ho usato il Sistema Air Brush della Copic e la tecnica della mascheratura....... ho capito...... vi faccio un tutorial ok??
Le carte sono My Mind's Eye e Melissa Frances su un cartoncino Kraft. Ho distressato tutti i bordi con il mio distress tool, poi ho aggiunto lo Stickles Crystal su tutti i bordi. Sul Kraft ho fatto una finta cucitura tono su tono. .
Un pizzo arricciato e un bellissimo nastro Papertrey Ink danno un tocco di eleganza, non trovate?
Le mezze perle in Teal e Cream sono anche queste una novità Whiff of Joy e sono disponibili anche in altri colori.
Il banner con i cuori della Whiff of Joy è dolcissimo e romantico come questa card.
Per la scritta, anche questa Whiff of Joy, ho usato il Frayed Burlap Distress Ink pad.
Sia l'immagine che il sentiment sono tagliati con  la Curved Rectangles Megas della Spellbinders. 

This stamp makes me feel so romantic!!!
 It's "Forever in love" a new release from Whiff of Joy.
To colored it I used my Copic Sketch and for the background I used Copic Air Brush Sistem and the masking tecnique....... I know..... I make a tutorial ok??
The papers are My Mind's Eye and Melissa Frances on a Kraft cardstock. I distressed all edges with my distress tool and then I added the Crystal Stickles. On the Kraft cardstock I made a faux stitch of the same color.
A curled lace and a beautiful Papertrey Ink ribbon add a touch of elegance, you know? The half pearls in Teal and Cream are from Whiff of Joy new release too and are also available in other colors.
Whiff of Joy Heart banner is sweet and romantic as this card.
For the sentiment Whiff of Joy I used Frayed Burlap Distress Ink pad.
For the image and also for the sentiment I used the Curved Retangles Mega form Spellbinders.


Ok..... per oggi è tutto!!!
Spero di avervi dato qualche idea o almeno avervi regalato un piccolo attimo di letizia!!!
Ci vediamo presto!!!!

Ok..... it's all for today!!!!
I hope to give you some ideas or at least a little bit of joy!!!
See you soon!!!

Thanks for stopping by

Giò

Whiff of Joy DT meets Stampavie & More challenge


Buongiorno a tutti e buon Mercoledì!!!!
Siete pronte per un altro Mercoledì di challenge??
Questa è la card per il challenge Stampavie & More.
Il tema di questa settimana è: Nastri!!!!

Good morning to all and happy Wednesday!!!!
Are you ready for anthor Wednesday's challenges??
This is the card I made for Stampavie & More challenge.
The theme for this week is: Ribbons!!!!


Cosa mi dite di questo nuovo timbro Whiff of Joy? "Friends Forever - Nora and Ben" è uno dei nuovi timbri di Maggio e come sicuramente noterete mi sono molto divertita a colorarlo con i Copic.
Per il cielo ho usato il sistema Air Brush della Copic con la tecnica della mascheratura.
Anche il sentiment è Whiff of Joy e fa parte del set "You are my hero" che contiene nove bellissime scritte!!!
L'ho stampato in nero e per tagliarlo ho usato la die "Versatile Shape I".
Per questa card ho usato una sola patterned (Cosmo Cricket) e ho arricchito con i nastri di seta che ho scelto nei colori usati per colorare l'immagine.
Anche le brads gialle sono una novità Whiff of Joy di questo mese.
La cucitura nera che richiama il matting ed è impreziosita da piccoli tocchi di glitter Pink Stickles.

What do you think about this new Whiff of Joy stamp? It's "Friends Forever - Nora and Ben" a new May release and you probably can see how much I have fun to colored it with my Copic.
For the sky I used the Air Brush Sistem by Copic and the masking tecnique.
Also the sentiment is from Whiff of Joy and is a part of "You are my hero" set, which contained nine beautiful sentiments. It's Black stamped and I cut it with "Versatile Shape I" die.
For this card I used only one patterned (Cosmo Cricket) and I enrich it with silk ribbon that I chose in the same colors used to colored the image.
Also the Yellow brads are a new May release from Whiff of Joy.
The stitching is Black as the matting and it's enriched with littles Pink Stickles touches


Spero che questi colori così allegri vi facciano compagnia sino al prossimo post.......
Ci vediamo più tardi!!!

I hope these so bright colors keep you company until the next post......
See you later!!!!

Thanks for stopping by

Giò

domenica 8 maggio 2011

Happy Mother's day and TSM challenge!!!!!!!


Buongiorno a tutti e
BUONA FESTA DELLA MAMMA!!!!!!
Oggi è un giorno speciale per tutte le mamme, me compresa, ho già ricevuto gli auguri dalle mie bellissime ragazze che mi hanno anche fatto un bellissimo regalo...... una Fairy della Thun...... la adoro!!!
Ma oggi è anche la festa della mia mamma e questa è la card che ho creato per lei, non vi nascondo che ci ho messo tutto l'impegno e l'amore che ho per lei!!!!
E' anche la card che ho preparato per il challenge TIMBROSCRAPMANIA!!!
Vi propongo il bellissimo tema scelto da Nico: CUCITURE E BOTTONI.

Good morning to all and
HAPPY MOTHER'S DAY!!!!!
Today is a special day for all the mothers, including me, I already received the greetings from my beautiful  girls which also gave me a wonderful present..... a Fairy by Thun..... I love it!!!
But today is also my mother's day and this is the card I created for her, with all the work and the love I feel for her!!!!
It is also the card I made for TIMBROSCRAPMANIA challenge!!!
I propose you the beautiful theme chosen by NicoSTITCHING AND BUTTONS.


Ho scelto di fare una easel card molto colorata usando questo tenerissimo timbro Tina Wenke per  Stampavie.
La bimba che imbuca le sue lettere nella cassetta della posta ha conquistato il mio cuore e mi sono proprio impegnata e divertita a colorarlo con i miei adorati Copic Sketch.
Dopodichè ho ritagliato l'immagine con la Label Nine Nestabilities e l'ho mattata di nero.
Con le carte My Mind's Eye collezione Gertie e tanti quadrati da 1 1/4" cuciti con il punto zig zag ho creato un patchwork coloratissimo.

I decided to make an easel card really colored using this tender Tina Wenke for Stampavie stamp.
The little girl who posts her letters on the mailbox took my heart and I had a lot of fun to color it with my loved Copic Sketch.
Then I cut the image with Labels Nine Nestabilities and I matted it in Black.
With My Mind's Eye papers from Gertie collection and a lot of 1 1/4" squares stitched with zig zag point I created a really colored patchwork. 


Per la scritta ho stampato ed embossato in bianco su cartoncino Kraft. Anche in questo caso ho tagliato con la Nestabilities Labels Nine e mattato in nero. Immancabile un bel fiocco con bottone.

For the sentiment I stamped and embossed in White on Kraft cardstock. Also in this case I cut with Labels Nine Nestabilities and matted in Black. Unfailing a bow with button.


Anche per l'interno ho giocato con la Nestabilities Labels Nine e la cucitura zig zag.
Ho assemblato la scritta usando diversi timbri e un alfabeto.
Siccome il tema prevedeva l'uso dei bottoni, ne ho usato un bel po....... come sapete i bottoni non mi piacciono LOL!!!

Also for the inside I played with Nestabilities Labels Nine and zig zag stitch.
I assambled the sentiment using different stamps and an alphabet.
Since the theme foresees the use of buttons, I used a lot of them......as you know I don't like buttons LOL!!! 


Per oggi è tutto, vi lascio con l'augurio a tutte le mamme di avere una giornata speciale e a tutte le figlie di rendere speciale la giornata delle loro mamme.

For today it is all, I leave you with the wish of all the mothers to have a really great day, and the daughters to make special their mothers's day.

Thanks for stopping by

Giò

giovedì 5 maggio 2011

POP UP CARD TUTORIAL

Buongiorno a tutti!!!
Oggi voglio mostrarvi un semplice tutoria per realizzare una divertente POP UP CARD.
Good morning to all!!!! 
Today I'd like show you a simple tutorial for a funny POP UP CARD.

Prima di tutto ecco la lista del materiale necessario:
First of ll this is the list of supplies you will need:

Kraft and Black cardstock
Two different patterned papers
Some buttons and brads
Ribbon and Charm
Paper trimmer and score board
ruler  and craft knife
double sided tape
bone folder

Adesso non vi resta che realizzarlo seguendo lo step by step fotografico.
Ho provato a farlo semplice e chiaro
Now you only have to make it....... please follow the step by step photo tutorial!!!
I tried to do it simply and clearly

 Tagliate un cartoncino alla misura di 4 1/4 inches per 11 inches.
Cut a piece of cardstock to 4 1/4 inches  by  11 inches.


 This is the card closed

I hope you like my tutorial and if you have any questions please feel free to contact me!!
Have a fabulous week

Thanks for stoppping by

Giò

mercoledì 4 maggio 2011

Stampavie & More challenge # 140


Buongiorno a tutti!!!!! Come state?? Spero bene!!
Le cards che vi mostro oggi, le ho create per il challenge Stampavie & More!!!
Il tema di questa settimana è: BABY.

Good morning to all!!! How are you?? I hope well!!
Today I show you the cards I created for Stampavie & More challenge!!!
This week's theme is: BABY.


Amo le easel cards e in questo caso sono rese particolari dall'uso della Label Ten Nestabilities.
Prima ho realizzato la versione maschile e ho scelto il Kraft mattato di Nero e l'Azzurro e il Giallo
Poi ho deciso di fare la versione femminile e ho scelto il Bianco mattato di Rosa e il Rosa e il Verde con un tocco di Kraft.
Questo dolcissimo timbro Artemio era nel cassetto ed aspettava di essere usato e questa mi è sembrata l'occasione giusta, l'ho prima stampato sul cartoncino di base, poi l'ho stampato su un cartoncino bianco e ho colorato e ritagliato i vari elementi per poi incollarli sulla base.
Nella card maschile ho stampato la nuvoletta e il sentiment con il Marina Mist della Stampin Up, nella card femminile ho usato il Kraft per la nuvoletta e il bianco per il sentiment.
I nastri sono Stampin Up e i bottoni Basic Grey.

I love Easel cards and in this case they are special because I used Label Ten Nestabilities.
First I created the baby boy card and for this one I chose Kraft matted with Black and also Pale Blue and Yellow colors. Then I decided to make a baby girl card too and in this case I chose White matted with Pale Pink and also Green, Pale Pink and a touch of Kraft colors.
I stamp this sweet Artemio stamp, first on the base cardstock and then on a White cardstock, so I colored and cut all elements and I stuck them on the base cardstock.
On the baby boy card I stamped the clouds and the sentiment with Marina Mist Ink from Stampin Up, on the baby girl card I used Crumb Cake from Stampin Up for the clouds and  White for the sentiment.
The ribbons are Stampin Up and the buttons are Basic Grey.


Oggi ho tantissime cose da fare ma prima di lasciarvi vi voglio augurare una giornata favolosa!!!!

Today I will be very busy but first of leave you I want wish you a fabulous day!!!

Thanks for stopping by

Giò

lunedì 2 maggio 2011

Tutorial per Whiff of Joy Inspirational blog


Buongiorno e buon Lunedi a tutti!!!!
Cosa c'è di meglio di un tutorial per incominciare bene la settimana.........
Ho appena pubblicato il tutorial per realizzare questa pop up card su
Andate a dare un'occhiata e fatemi sapere se vi piace.

Good morning and Happy Monday to all!!!
what better way to start the week  with a tutorial?
I just posted the tutorial to make this pop up card on
Please go to take a look and let me know if you like it.

Questa è la card chiusa!

This is the closed card!
 Ecco alcune foto dei particolari di questa card.

Here are some photo of the details of this card.


Sono sicura che fare questa card vi piacerà come è piaciuto a me.
Se decidete di realizzarla seguendo il tutorial, fatemelo sapre, sarò felice di venire a vedere il vostro lavoro.
Felice settimana!!!!

I am sure you will love make this card as I have loved.
If you decide to follow the tutorial, please let me know and I will be happy to take a look.
Have a fabulous week!!!!

Thanks for stopping by

Giò